The Herbal Harvest & Preservation Handbook
A Practical Companion to Harvesting, Drying, Storing, and Protecting Medicinal Herbs for Maximum Potency
🌿 What This Herbal Handbook Covers
Imagine stepping into your lush healing garden, where vibrant herbs whisper secrets of natural wellness and timeless remedies awaken at your touch. Herbal gardening becomes more meaningful when attention is given to how plants grow, are harvested, and cared for over time. Welcome to the friendly comprehensive guide which serves as a calm starting point for working on growing, harvesting, drying, and storing medicinal herbs—rooted in U.S. favorites and gems from India and beyond. The focus remains on observation, seasonal timing, and gentle methods that help preserve each plant's natural charater from harvest through storage.
Each herb has its own rythms— from harvest to storage—which are explored in the individual herb profile.

🌱 Introduction to Medicinal Herb Harvesting
The art of harvesting medicinal herbs is as important as growing them. When you harvest with precision, intention, and proper knowledge, you preserve the plant's vital medicinal compounds—essential oils, alkaloids, flavonoids, and other therapeutic constituents that give herbs their healing properties. Poor harvesting techniques, incorrect timing, or improper drying methods can reduce potency by 50% or more, rendering your herbs far less effective.
Each herb requires specific harvesting techniques and timing to maximize its medicinal value. Understanding these nuances separates mediocre herbal preparations from truly potent remedies. Throughout this guide, you'll learn not just the "how" but the "why" behind each recommendation, empowering you to make informed decisions in your own herbal practice.
This handbook is designed as a long-term reference — something you can return to season after season as your herbal garden evolves. Whether you grow a few pots on a balcony or manage a larger healing garden, these principles remain consistent.
🔑 Universal Harvesting Principles & Best Practices
Before diving into individual plant profiles, it's essential to understand the universal principles that apply to harvesting nearly all medicinal herbs. These foundational guidelines will ensure you capture maximum potency regardless of which plants you're working with.
🕐 Timing & Time of Day
- Morning Harvest Window: Harvest in early to mid-morning (10 AM - 12 PM), after morning dew has completely dried but before the intense midday heat. This is when essential oils and active compounds are most concentrated in plant tissues.
- Weather Conditions: Choose warm, dry days with low humidity. Never harvest after rain, during fog, or when plants are wet—excess moisture promotes mold growth during drying and dilutes medicinal compounds.
- Avoid Afternoon Harvesting: By afternoon, many flowers begin to close, and plants experience stress from heat, which can reduce volatile oil content by 20-30%.
🌿 Sustainable Harvesting Ethics
- One-Third Rule: Never harvest more than one-third of any plant's total foliage or flowers at once. This allows the plant to recover, continue photosynthesis, and thrive for future harvests.
- Plant Maturity: Only harvest from healthy, vigorous, mature plants. Young or stressed plants need all their energy for growth and establishment.
- Root Harvesting: For perennials, wait until plants are at least 2-3 years old before root harvesting. Leave young plants undisturbed to establish strong root systems.
- Rotation: If you have multiple plants, rotate which ones you harvest from to prevent over-stressing any single specimen.
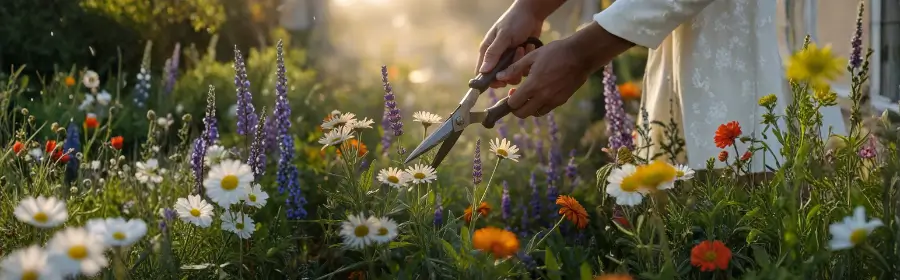
✂️ Proper Cutting Technique
- Sharp Tools: Use sharp, clean pruning shears, scissors, or knives. Dull blades crush plant tissue, creating entry points for disease and reducing medicinal quality.
- Sterilization: Clean tools with rubbing alcohol between plants to prevent disease transmission, especially when harvesting from multiple specimens.
- Clean Cuts: Make decisive cuts at appropriate nodes (where leaves meet stems) to encourage healthy regrowth.
- Angle Cuts: Cut at a 45-degree angle to prevent water from pooling on cut surfaces, which can lead to rot.
🏞️ Location & Environment
- Pollution-Free Zones: Only harvest from areas at least 50 feet away from roads, highways, or other sources of vehicle exhaust and pollutants.
- Pesticide-Free: Ensure no pesticides, herbicides, or chemical fertilizers have been used for at least 3 months (preferably 1 year) before harvesting.
- Soil Quality: Test soil for heavy metals and contaminants if you're uncertain about the land's history. Plants absorb toxins from contaminated soil.
- Wild Harvesting: If wildcrafting, obtain proper permissions and ensure you can identify plants with 100% certainty. Many medicinal herbs have toxic look-alikes.
🌿 Handbook Insight: The Morning Dew Rule
Wait until dew has fully evaporated before harvesting, but don't wait so long that the sun's heat has stressed the plant. The sweet spot is typically 9-11 AM on clear days. Plants harvested with residual moisture are prone to mold and bacterial growth during drying, which ruins the entire harvest and can even be dangerous if consumed.
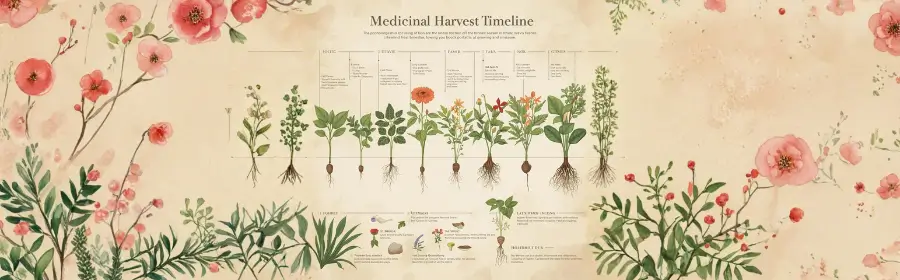
⏰ Understanding Optimal Harvest Timing
Different plant parts reach peak medicinal potency at different growth stages. Understanding when to harvest each part is crucial for maximum therapeutic benefit.
Harvesting by Plant Part
🍃 Leaves (Foliage)
Leaves contain the highest concentration of chlorophyll, flavonoids, and many alkaloids. They're most potent in spring and early summer before the plant flowers. Once flowering begins, the plant redirects energy from leaf production to flower and seed development, reducing leaf potency by up to 40%.
- Optimal Stage: Harvest when leaves are fully expanded but still young and tender
- Avoid: Yellowing, damaged, or diseased leaves
- Best Season: Late spring to early summer, before flowering
- Examples: feverfew leaves, marshmallow leaves, chicory leaves
🌸 Flowers
Flowers contain concentrated essential oils, volatile compounds, and specific alkaloids. The exact harvest stage varies by plant but generally falls when flowers have just opened or are in early bloom stages. Waiting too long results in loss of volatile oils and reduced effectiveness.
- Optimal Stage: Just as flowers open or when 1/3 to 2/3 of buds have bloomed (varies by species)
- Avoid: Overblown, fading, or browning flowers
- Best Season: Summer during peak blooming period
- Examples: chamomile, calendula, lavender, echinacea flowers
🌾 Aerial Parts
Aerial parts include stems, leaves, and flowers harvested together. This is ideal when all parts contribute to the plant's medicinal value. Harvest at the beginning of flowering when both foliage and blooms are at peak potency.
- Optimal Stage: Early flowering stage
- Technique: Cut top 6-12 inches of flowering stems
- Best Season: Early to mid-summer
- Examples: yarrow, california poppy, feverfew
🥕 Roots
Roots store carbohydrates, minerals, and many medicinal compounds. They're most potent in early spring before new growth begins, or in fall after the plant goes dormant. During these times, the plant concentrates maximum energy and compounds in underground structures.
- Optimal Season: Early fall (September-October) or early spring (March-April)
- Plant Age: Second year or older for biennials; 3-4 years for perennials
- Dormancy: Best when plant is dormant and has transferred maximum nutrients underground
- Examples: chicory root, marshmallow root, echinacea root, evening primrose root
🌰 Seeds
Seeds contain concentrated oils, proteins, and specific medicinal compounds. Harvest after flowers have faded and seed heads have matured but before natural seed dispersal occurs.
- Optimal Stage: When seed pods/heads turn brown but haven't opened yet
- Timing: Late summer to early fall
- Visual Cue: Seeds should be dark colored and easily separate from pods
- Examples: evening primrose seeds, california poppy seeds
🗓️ Planning Your Harvest Schedule
Create a garden journal or calendar marking expected harvest times for your specific region. Note that harvest windows can shift by 2-4 weeks depending on whether you're in northern or southern growing zones. Track actual harvest dates and plant performance to refine your timing each year.
Seasonal Harvest Awareness
Many gardeners notice that herbs behave differently depending on the time of year. Leaves tend to be tender in spring, flowers peak in summer, and roots often store their energy underground as fall approaches. Understanding these patterns can make harvesting feel more intuitive and less rushed.
Harvesting isn't about collecting everything at once. Leaving plenty behind allows plants to continue growing — and keeps your garden visually and ecologically balanced.
Seasonal Herbal Gardening Notes: Observing Your Garden Through the Year
Some gardeners like to keep simple seasonal garden notes — what bloomed earlier than expected, what lingered longer, or what felt different this year. Over time, these small patterns often become the most valuable guide of all.
This page is designed as a living reference rather than a rulebook. Many gardeners find that the most useful lessons come not from exact schedules, but from noticing how their garden responds as the seasons change.
These notes offer gentle guidance for observing herbs throughout the year — supporting curiosity, patience, and long-term confidence.
Spring Notes: Early Growth & Leaf Energy
Spring often brings rapid leaf growth and tender textures. Herbs may appear almost overnight, responding quickly to warming soil and longer days.
Many gardeners notice that early spring leaves feel softer and more delicate. This is often a time when restraint is helpful — allowing plants to establish before harvesting heavily.
Summer Notes: Flowers, Heat & Timing
Summer highlights flowering cycles and the effects of heat. Some herbs thrive in full sun, while others show signs of stress during prolonged warmth.
Gardeners often observe differences between morning and afternoon harvesting. Early morning, after dew has dried, is commonly associated with fresher textures and less moisture.
Fall Notes: Roots, Seeds & Slowing Down
As daylight shortens, many herbs begin shifting energy underground. Leaves may slow, flowers fade, and attention often turns toward roots and seeds.
Fall is commonly associated with careful root digging, seed collection, and preparation for dormancy.
Winter Notes: Rest, Review & Planning
Winter offers space for review rather than action. Gardeners often revisit notes, label stored jars, and think about what they might adjust next year.
Even without fresh growth, the garden continues to teach — through stored harvests and remembered observations.
Over time, these small seasonal observations often become more valuable than any fixed schedule — building confidence one season at a time.
A Calm Approach to Herbal Gardening
A healing garden is as much about observation as action. By slowing down and noticing how plants respond to weather, light, and harvesting, gardeners often develop confidence naturally — season by season.
Returning to the Garden, Season by Season
Many gardeners don't read guides like this all at once. Instead, they return to certain sections as the seasons shift — spring planting, summer harvesting, fall root digging.
This page is designed to be revisited. You may find yourself coming back to a single herb, a drying tip, or a seasonal note when it naturally becomes relevant again.
If you found this guide helpful, you might consider:
- Saving or bookmarking this page for future harvest seasons
- Pinning a section that speaks to your current garden phase
- Returning as your plants move from leaf to flower to rest
Over time, small observations compound. The more often you notice how plants respond, the more natural herbal gardening begins to feel.
🌬️ Drying & Preservation of Plants
Drying herbs is often where new gardeners feel the most uncertainty. Drying herbs slowly and thoughtfully helps preserve their aroma, texture, and color.
Different plant parts behave differently once harvested. What works for flowers may not feel right for roots and learning that difference is part of the process.
And similarly what works beautifully for one herb may feel wrong for another.
This page offers calm, practical observations based on what many gardeners notice over time — helping you build confidence through experience rather than strict rules.
Drying Flowers Gently
Flowers such as chamomile, calendula, and lavender buds are often the most delicate parts of the plant. Gardeners commonly notice that flowers respond best to patience, good airflow, and protection from direct light.
- Air-drying or screen drying is often preferred
- Spacing helps prevent trapped moisture
- Lower temperatures help preserve color and aroma
Drying Leaves Without Losing Aroma
Leaves like lemon balm, mint, and yarrow tend to hold more moisture than flowers. Many gardeners notice that leaves can lose aroma if drying is too slow, especially in humid conditions.
- Smaller bundles dry more evenly than large ones
- Good air circulation matters more than warmth
- Leaves are usually ready when they crumble easily
Drying Roots Slowly & Safely
Roots such as marshmallow, echinacea, and chicory behave very differently from aerial plant parts. Their density means moisture is trapped inside, even when the surface feels dry.
- Slicing roots helps moisture escape evenly
- Drying time is longer than for leaves or flowers
- Internal dryness matters more than appearance
Many gardeners check root dryness by snapping a piece — a clean break usually signals readiness.
With practice, drying herbs becomes less about perfection and more about recognizing subtle cues — texture, scent, and the quiet signals plants offer when they're ready.
🌬️ Core Drying & Preservation Methods
Proper drying is essential for preserving medicinal compounds, preventing mold, and ensuring long shelf life. Different plant parts require different approaches.
Understanding Why Proper Drying Matters
When herbs are harvested, they contain 60-80% water content. This moisture must be removed quickly and completely to:
- Prevent mold, bacteria, and enzymatic degradation
- Concentrate medicinal compounds
- Preserve essential oils, alkaloids, and other active constituents
- Ensure safe long-term storage
- Maintain color, aroma, and therapeutic potency
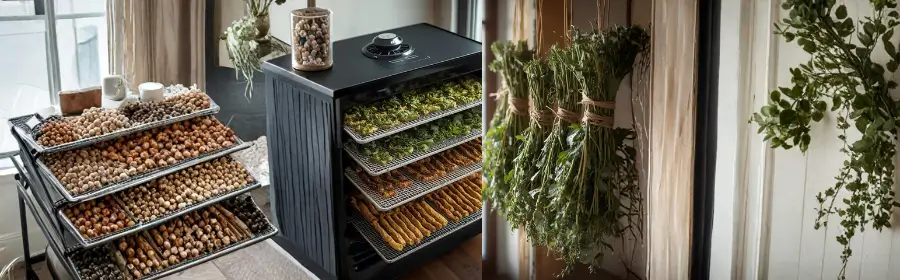
Method 1: Food Dehydrator (Recommended for Most Herbs)
Advantages:
- Fast, controlled drying preserves maximum potency
- Precise temperature control prevents overheating
- Works in any climate, including high humidity areas
- Prevents mold and ensures even drying
- Typically completes drying in 2-12 hours vs. 1-3 weeks air-drying
Temperature Guidelines:
- Delicate flowers & leaves: 95-105°F (chamomile, calendula, lavender flowers)
- Hardy leaves & aerial parts: 105-110°F (yarrow, feverfew, mint)
- Roots: 110-125°F (chicory, echinacea, marshmallow)
- Never exceed 125°F: Higher temperatures destroy volatile oils and heat-sensitive compounds
Best Practices:
- Spread herbs in single layer on trays—don't overcrowd
- Leave space between pieces for airflow
- Rotate trays every 2-3 hours for even drying
- Check regularly—different plant parts dry at different rates
- Don't mix different herbs on same tray (flavors and scents can transfer)
Method 2: Air-Drying / Hang-Drying (Traditional)
Best For:
- Hardy herbs with woody stems (lavender, yarrow, sage, rosemary)
- Large-scale harvests when dehydrator space is limited
- Herbs with high essential oil content that benefit from slow drying
- Low-humidity climates (under 60% relative humidity)
Requirements:
- Location: Dark space (closet, attic, spare room, covered porch)
- Temperature: 60-80°F ambient temperature
- Airflow: Good ventilation (use fan if needed)
- Humidity: Low humidity (under 60% RH)
- Light: Complete darkness or very low light (prevents degradation)
Bundle Method:
- Gather 4-10 stems together (vary by thickness)
- Secure with rubber band or string 1 inch from cut ends
- Don't bundle too tightly—air must circulate
- Hang upside down from hooks, rafters, or drying rack
- Keep bundles spaced apart (6+ inches between)
- Drying time: 1-3 weeks depending on conditions
Screen/Tray Method:
- Use window screens, drying racks, or mesh trays
- Spread herbs in single layer
- Turn daily for even drying
- Best for flowers, delicate leaves, or short-stemmed herbs
- Stack screens with spacers for multi-level drying
Method 3: Paper Bag Drying (For Seeds & Some Aerial Parts)
- Place seed heads or flowering stems in large paper bags
- Punch holes in bag for ventilation
- Hang or place in warm, dry location
- Seeds will drop to bottom as pods dry and split
- Perfect for evening primrose, california poppy, and other seed collection
Method 4: Oven Drying (Emergency/Small Batches Only)
⚠️ Not Recommended
Conventional ovens typically can't maintain low enough temperatures (95-110°F) for proper herb drying. Most ovens' lowest setting is 170°F or higher, which destroys essential oils and medicinal compounds. Only use oven drying as last resort, with door propped open, and careful monitoring. Dehydrators or air-drying are vastly superior.
Testing for Complete Dryness
Properly dried herbs should have these characteristics:
- Leaves: Crispy, crumble easily between fingers, snap cleanly
- Flowers: Papery texture, petals separate easily, no moisture when squeezed
- Stems: Snap cleanly rather than bend
- Roots: Completely brittle, snap with audible crack, dry throughout interior
- No Flexibility: Nothing should bend or feel pliable
- No Moisture: No dampness or cool feeling when handled
The Snap Test:
Bend a stem or piece of herb. If it snaps cleanly with a crisp sound, it's dry. If it bends without breaking, it needs more drying time.
🌡️ Temperature vs. Quality
Lower temperatures = Higher quality. While higher temps dry faster, they degrade heat-sensitive compounds like essential oils, vitamin C, and certain alkaloids. The ideal range (95-110°F) balances speed with preservation of medicinal compounds. Patience yields better medicine.
📦 Long-Term Storage Best Practices
Once fully dried, herbs are commonly stored based on their structure. Flowers, leaves, and roots often benefit from slightly different storage habits.
Proper storage protects your carefully harvested and dried herbs from degradation, maintaining potency for months or even years.
- Flowers and leaves are often kept whole until use
- Roots are usually stored sliced or chopped
- Glass jars help protect from moisture and light
- Clear labeling supports seasonal awareness
With practice, drying herbs becomes less about perfection and more about recognizing subtle cues — texture, scent, and the quiet signals plants offer when they're ready.

Storage Container Options
✅ Best Choice: Dark Glass Jars
- Amber (brown) or cobalt blue glass jars are ideal
- UV-protective glass prevents light degradation
- Airtight lids prevent moisture and oxygen exposure
- Mason jars work if stored in dark location
- Various sizes allow proper storage without excess air space
✅ Good Alternatives:
- Mylar bags: Light-proof, airtight, good for bulk storage
- Vacuum-sealed bags: Removes oxygen, extends shelf life
- Metal tins: Light-proof but ensure airtight seal
- Food-grade plastic containers: Acceptable short-term but not ideal long-term
❌ Avoid:
- Clear glass jars (unless stored in complete darkness)
- Cardboard boxes (absorb moisture, not airtight)
- Plastic bags (not airtight, can leach chemicals)
- Containers that previously held strong-smelling substances
Optimal Storage Conditions
🌡️ Temperature:
- Cool: 60-70°F is ideal
- Avoid temperature fluctuations
- Never store near heat sources (stoves, radiators, sunny windows)
- Refrigeration unnecessary and can introduce moisture
💡 Light:
- Complete darkness or very low light
- Light (especially UV) degrades chlorophyll, essential oils, and many active compounds
- Store in pantry, cupboard, or darkened room
- Even amber glass benefits from dark storage
💧 Moisture:
- Low humidity environment (under 60% RH)
- Never store in bathrooms or damp basements
- Consider silica gel packets for high-humidity climates
- Ensure herbs are 100% dry before storage (any moisture causes mold)
🌬️ Air/Oxygen:
- Minimize air exposure with airtight seals
- Fill containers appropriately—minimal headspace
- Oxygen absorber packets extend shelf life for long-term storage
- Open containers infrequently to limit oxygen exposure
Labeling System
Proper labeling is essential for safety and quality control:
- Plant Name: Both common and Latin name (prevents confusion)
- Plant Part: Root, leaf, flower, aerial parts, etc.
- Harvest Date: Month and year minimum
- Harvest Location: Garden, wild location, purchased
- Optional: Growing conditions, intended use, batch notes
🏷️ Label Example
echinacea purpurea (Purple Coneflower)
Root - 4 year old plant
Harvested: October 2024
Location: Back garden bed #3
Notes: Passed tingle test ✓
Shelf Life Guidelines
| Plant Part | Optimal Potency | Maximum Storage | Signs of Degradation |
|---|---|---|---|
| Flowers (delicate) | 6-12 months | 18 months | Color fading, loss of aroma, brittleness |
| Leaves | 12 months | 18-24 months | Browning, loss of aroma, dusty texture |
| Aerial Parts | 12 months | 18 months | Color change, aroma loss |
| Roots (whole) | 18-24 months | 2-3 years | Softening, mold, loss of characteristic scent |
| Ground/Powdered | 6-12 months | 12 months | Color fading, aroma loss (degrades faster) |
| Seeds | 1-2 years | 2-3 years | Rancid smell (if oily seeds), loss of viability |
Quality Checks & Maintenance
- Monthly Inspection: Check stored herbs for signs of moisture, mold, or insects
- Aroma Test: Herbs should retain characteristic scent—loss indicates degradation
- Visual Check: Color should remain relatively vibrant (some fading is normal)
- Moisture Check: Herbs should remain crispy and dry, not softening
- Rotate Stock: Use older herbs first, label new harvests clearly
⚠️ When to Discard Herbs
Discard dried herbs immediately if you notice:
- Any visible mold (fuzzy growth, white/green/black spots)
- Musty, moldy, or off odors
- Insect infestation or webbing
- Complete loss of characteristic aroma
- Significant color change (bright green to brown/gray)
- Dampness or softening (indicates moisture intrusion)
Better safe than sorry—when in doubt, compost it and harvest fresh.
Extending Shelf Life
- Whole vs. Ground: Store herbs whole and grind/crush only as needed—whole herbs last 2-3x longer
- Oxygen Absorbers: Small packets that remove oxygen from sealed containers
- Vacuum Sealing: Removes air, significantly extends shelf life
- Smaller Containers: Transfer small amounts to daily-use jars, keeping bulk storage sealed
- Desiccant Packets: Silica gel packets absorb any residual moisture in humid climates
🛠️ Essential Tools & Equipment
Having the right tools makes harvesting easier, faster, and ensures you capture maximum medicinal potency. Here's what every medicinal herb gardener needs:
Harvesting Tools
- Pruning Shears/Secateurs: Bypass-style (not anvil) for clean cuts on stems up to 1/2 inch diameter
- Harvest Scissors: Sharp scissors for delicate flowers and leaves
- Garden Fork/Spading Fork: Essential for root harvesting without damaging taproots
- Harvest Basket: Woven basket or breathable container that allows airflow
- Garden Gloves: Protect hands from thorns, sticky resins, and soil
- Kneeling Pad: Makes ground-level harvesting more comfortable
Cleaning & Processing
- Soft Brush: For gently cleaning roots without damage
- Colander: For rinsing herbs (when necessary)
- Clean Towels: For patting herbs dry
- Cutting Board & Knife: For processing roots and larger plant materials
Drying Equipment
- Food Dehydrator: Excalibur, Nesco, or similar with temperature control (recommended)
- Drying Screens: Fine mesh screens for delicate flowers
- Drying Racks: Stackable for air-drying multiple herbs
- Cotton String/Twine: For bundling herbs to hang-dry
- Paper Bags: For drying seeds and some aerial parts
Storage Supplies
- Dark Glass Jars: Amber or cobalt blue with tight-fitting lids
- Labels: Waterproof labels for marking containers
- Permanent Marker: For writing plant names, parts, and dates
- Airtight Containers: Mason jars, Kilner jars, or vacuum-seal bags
⚠️ Tool Maintenance
Clean and sterilize all harvesting tools between uses, especially when moving between different plants. Use rubbing alcohol (70% isopropyl) or a 10% bleach solution. Dull tools should be sharpened regularly—clean cuts heal faster and reduce disease risk.
⚠️ Safety, Sustainability & Legal Considerations
Responsible herb harvesting requires attention to safety, ecological sustainability, and legal compliance. These practices protect both you and the environment.

🔍 Plant Identification & Safety
Positive Identification is Critical
- 100% Certainty Required: Never harvest or consume any plant unless you are absolutely certain of its identity
- Toxic Look-Alikes Exist: Many medicinal plants have poisonous relatives that appear similar
- Use Multiple Resources: Cross-reference with field guides, apps, and expert identification
- Learn Key Features: Study leaf arrangement, flower structure, growth habitat, scent, and other identifying characteristics
- When in Doubt, Don't: If you have any uncertainty, do not harvest
Identification Tools & Resources
- Field Guides: Regional plant identification books with detailed photos and descriptions
- Plant ID Apps: PlantNet, iNaturalist, PictureThis (use as supplementary tools, not sole source)
- Local Herbalists: Join herb walks and workshops with experienced practitioners
- Botanical Gardens: Visit to see correctly identified specimens in person
- University Extensions: Many offer plant identification services
⚠️ Common Dangerous Look-Alikes
- Poison Hemlock (deadly) can resemble wild carrot/parsley family members
- Foxglove (toxic) can resemble comfrey or other fuzzy-leaved plants
- Lily-of-the-Valley (toxic) can resemble wild garlic when not in bloom
- Monkshood (deadly) can resemble other garden perennials
- Never rely on a single feature—use comprehensive identification
🌍 Sustainable Harvesting Practices
The One-Third Rule
Never harvest more than one-third of any plant population or individual plant. This ensures:
- Plants can recover and continue growing
- Adequate photosynthesis for plant health
- Seeds remain for reproduction
- Wildlife food sources are preserved
- Future harvests remain possible
Wildcrafting Ethics
If harvesting from wild populations (not your garden):
- Obtain Permission: Always get landowner permission before harvesting
- Know Local Regulations: Some plants are protected and illegal to harvest
- Assess Population Health: Only harvest from abundant, thriving populations
- Leave Rare Species: Never harvest threatened or uncommon plants
- Rotate Locations: Don't return to the same spot repeatedly
- Minimize Impact: Tread lightly, avoid trampling, close gates, pack out trash
- Consider Cultivation: Growing your own is more sustainable than wildcrafting
Root Harvesting Considerations
- Root harvesting kills or significantly stresses plants
- Only harvest roots from abundant cultivated plants or very common wild species
- Consider dividing plants and replanting portions
- Leave younger plants to mature and reproduce
- Never harvest roots of rare or threatened species
☠️ Contamination & Pollution Concerns
Avoid Contaminated Areas
- Roadsides: Vehicle exhaust deposits heavy metals (lead, cadmium) on plants—harvest at least 50 feet from roads
- Agricultural Fields: Pesticide and herbicide drift can extend hundreds of feet
- Industrial Areas: Soil contamination from factories, mines, or industrial sites
- Treated Lawns: Chemical lawn treatments persist in soil and plants
- Railroad Tracks: Herbicides used for vegetation control
Pesticide-Free Growing
- Wait minimum 3 months (preferably 1 year) after last pesticide/herbicide application before harvesting
- Grow medicinal herbs organically whenever possible
- Even "natural" pesticides require withdrawal periods
- Ask previous landowners about land use history if uncertain
Soil Testing
- Consider soil testing if land history is unknown
- Test for heavy metals (lead, arsenic, cadmium)
- University extension services often provide affordable testing
- Particularly important for root crops which concentrate soil contaminants
👨👩👧👦 Household Safety
Storage Safety
- Child Safety: Store all dried herbs out of reach of children
- Clear Labeling: Label containers clearly to prevent misidentification
- Pet Safety: Some herbs toxic to humans are safe for consumption, but many are toxic to pets—store securely
- Separate from Food: Store medicinal herbs separately from culinary herbs to prevent confusion
Preparation Safety
- Wash hands before handling dried herbs
- Use clean utensils and containers
- Follow proper dosage guidelines—more is not better
- Start with small amounts to test for allergic reactions
- Keep records of what you harvest and use
⚖️ Legal Considerations
Protected & Regulated Plants
- Some medicinal plants are legally protected in certain states
- American ginseng, goldenseal, and other native herbs have harvest restrictions
- National and state parks prohibit plant harvesting
- Check local, state, and federal regulations before wildcrafting
- Obtain required permits if applicable
Private vs. Public Land
- Private Property: Always obtain explicit permission from landowner
- Public Land: Research specific regulations—many prohibit or restrict plant harvesting
- Your Own Property: Generally unrestricted, but check local ordinances
- Neighbors' Property: Get permission even if plants overhang into your yard
🏥 Medical Considerations & Disclaimers
⚠️ Important Medical Disclaimer
This guide provides educational information only and is not medical advice. Medicinal herbs can have powerful effects and may interact with medications, medical conditions, or cause allergic reactions.
- Consult qualified healthcare providers before using herbs medicinally
- Inform your doctor about all herbs and supplements you use
- Do not use herbs to replace prescribed medications without medical supervision
- Pregnant and breastfeeding women should consult healthcare providers before using any herbs
- Keep herbs away from children unless specifically recommended by pediatric healthcare provider
- Discontinue use and seek medical attention if adverse reactions occur
When to Avoid Herbal Use
- Pregnancy & Breastfeeding: Many herbs are contraindicated—always consult healthcare provider
- Before Surgery: Some herbs affect blood clotting or interact with anesthesia
- Chronic Medical Conditions: Liver disease, kidney disease, autoimmune conditions require medical consultation
- Medication Interactions: Herbs can enhance or inhibit prescription drug effects
- Children Under 12: Use only with appropriate professional guidance
Common Drug-Herb Interactions
- Blood Thinners: feverfew, ginger, garlic can increase bleeding risk
- Sedatives: california poppy, chamomile, lavender can enhance sedative effects
- Blood Pressure Medications: Some herbs affect blood pressure
- Immune Suppressants: echinacea may counteract immunosuppressive drugs
- Diabetes Medications: Some herbs affect blood sugar levels
🌱 Sustainable Gardening Practices
Growing Your Own (Most Sustainable Option)
- Cultivating medicinal herbs in your garden is more sustainable than wildcrafting
- You control growing conditions and avoid contamination
- Harvest timing can be optimized for potency
- No impact on wild populations
- Most medicinal herbs are easy to grow and low-maintenance
Organic & Regenerative Methods
- Use organic growing methods—no synthetic pesticides or fertilizers
- Build healthy soil with compost and organic matter
- Practice crop rotation
- Encourage beneficial insects and pollinators
- Mulch to conserve water and suppress weeds
- Save seeds and propagate plants for continuous supply
Water Conservation
- Many medicinal herbs are drought-tolerant once established
- Use drip irrigation or soaker hoses for efficiency
- Mulch to reduce evaporation
- Group plants by water needs
- Harvest rainwater when possible
🌍 Environmental Stewardship
As herbalists and plant enthusiasts, we have a responsibility to protect and preserve medicinal plant populations for future generations. Practice sustainable harvesting, grow your own whenever possible, support conservation efforts, and educate others about ethical wildcrafting. Our healing relationship with plants should be reciprocal—we care for them as they care for us.
📚 Herbal Harvest & Storage Quick Reference
Here's a condensed overview of key harvesting principles for quick consultation in the field or garden:
⏰ Best Harvest Time
Time of Day: Mid-morning (9-11 AM) after dew dries
Weather: Warm, dry, sunny days
Season: Varies by plant part (see calendar)
✂️ Harvest Amount
Maximum: 1/3 of plant material
Roots: 2+ year old plants only
Leave: Enough for recovery & reproduction
🌬️ Drying Temps
Flowers/Leaves: 95-110°F
Roots: 110-125°F
Time: Until snap/crumble test passes
📦 Storage Essentials
Container: Dark glass, airtight
Location: Cool, dark, dry
Label: Name, part, date
Shelf Life: 6-24 months (varies)
❓ Frequently Asked Questions About Harvesting & Preserving Medicinal Herbs
When is the best time of day to harvest medicinal herbs?
The best time to harvest medicinal herbs is mid-morning, typically between 9:00 and 11:00 AM, after the morning dew has completely dried but before the heat of the day sets in. This timing helps preserve essential oils and reduces the risk of mold during drying.
How do I know when herbs are fully dried and ready for storage?
Herbs are fully dried when leaves crumble easily, stems snap cleanly instead of bending, and roots break with a crisp sound. Any remaining flexibility usually indicates trapped moisture, which can lead to mold during storage.
What is the best way to store dried medicinal herbs long term?
Dried medicinal herbs store best in airtight, dark glass containers kept in a cool, dry, and dark location. Avoid exposure to light, heat, moisture, and air to preserve potency and extend shelf life.
How long do dried medicinal herbs stay potent?
Most dried leaves and flowers retain optimal potency for about 6–12 months, while roots and seeds can remain effective for 2–3 years when properly dried and stored. Aroma, color, and texture are key indicators of quality over time.
Is it safe to dry medicinal herbs in the oven?
Oven drying is generally not recommended because household ovens run too hot and can destroy delicate medicinal compounds. If no other option is available, use the lowest temperature setting with the door slightly open and monitor closely.
🎓 Final Thoughts & Continued Learning
Herbal harvesting is both science and seasonal art. This handbook brings together practical field wisdom and preservation science to help you maintain potency, purity, and safety. Every harvest teaches you something new about plant cycles, optimal timing, and the subtle qualities that indicate peak potency. This guide provides the foundation, but your own experience will be your best teacher.
Building Your Skills
- Keep a Garden Journal: Record harvest dates, weather conditions, plant performance, and results
- Note Regional Variations: Timing shifts by location—track what works in your specific area
- Experiment Mindfully: Try different drying methods and storage approaches to find what works best
- Compare Batches: Harvest the same herb at different times to learn optimal windows
- Join Herbal Communities: Connect with local herbalists, join workshops, attend herb walks
- Continue Education: Read herbals, take courses, study plant medicine traditions
Quality Over Quantity
It's better to harvest smaller amounts at optimal timing with proper technique than to rush through large harvests carelessly. High-quality, potently harvested herbs require smaller doses and provide better results. Your medicine will only be as good as your harvesting and preservation practices.
The Reciprocal Relationship
As you develop your harvesting practice, cultivate gratitude and reciprocity with the plants. Thank them for their medicine, harvest mindfully, save seeds, share knowledge, and protect wild populations. This reciprocal relationship enriches both the plants' survival and the effectiveness of your herbal practice.
🌟 Your Herbal Journey
You now have comprehensive knowledge to harvest, preserve, and store ten powerful medicinal herbs with professional-quality results. Start with one or two herbs that grow well in your climate, master those completely, then expand your repertoire. Each herb has unique characteristics and gifts to share. Welcome to the rewarding world of medicinal herb cultivation and harvesting!
🌿 Ready to Start a Medicinal Garden at Home?
If natural living resonates with you, a medicinal garden is one of the most practical ways to begin. Learn how everyday plants can support wellness, safety, and self-reliance — even in small spaces.